|
Uploading to UH Servers with Fugu This tutorial assumes that you have already created your web page and are ready to post it on the Internet for all to see. Be sure to have all of the necessary files for your web page in single folder that is accessible on the machine where you will be completing this task. UH makes 20 megabytes (MB) of web space available to every user with "hawaii.edu" account. To use this space, you must first visit ITS's web site and activate your personal homepage. Start by going here (the link should open in a new window so you can keep referring back to this tutorial).
The next page displays two options for your homepage. The first is for very basic homepages that have been generated using UH's automated server pages. It will probably not work for your pages created with Dreamweaver, so choose the second option on the right that says "Make everything within the 'public_html' directory viewable from the Internet." Click on the button at the bottom to confirm your choice.
The server is now ready for you to upload your files. Before we
do that, make sure that your files are in an acceptable format for the server.
Remember to remove any spaces from your file names. These can cause problems
once they are loaded onto the server. Also, your main page should be named
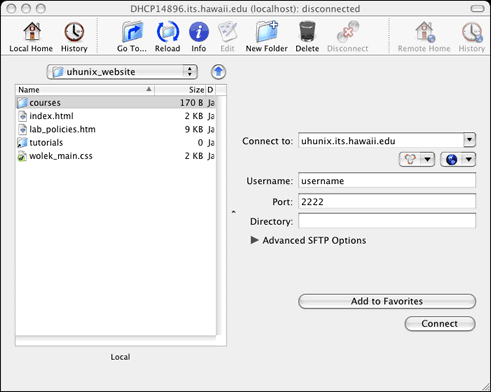
Go ahead and launch Fugu by clicking on its icon in the dock. You should see a window like this (if not, it is available by choosing Show SFTP Window in the File menu):
In the panel on the right, you will need to fill in the options as you see
them above. The first provides the address of the server to which you are
trying to connect. This computer will host the files for your web
page and make them available for people to browse. The address of that computer
at UH is Next is your username. Be sure to type in your actual username and not the one that I have entered. After that comes the port number. Ports are a kind of sub-heading for computer networking connections. Think of the URL or address as being like a telephone number and the port as being like the extension you are dialing. UH requires you to use "2222" for uploading web pages. If you fail to enter this number for UH's server, the connection will work but the file permissions will be messed up.
After another few seconds, the right panel should change to look similar to the left one. These panels are meant to mimic the usability of the Finder. The drop down menus at the top show you the folder you are currently viewing, with the files contained therein displayed in the list below. The list on the left displays files found on the local computer you are using, while the list on the right displays files on the server.
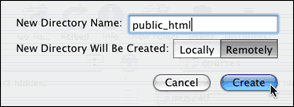
If you do not have such a folder, click on the New Folder icon in the toolbar at the top of the window. This will cause a sheet to drop down from the top of the window that looks like this:
Unfortunately, you do not have an option on what to name your
folder. It must be called Now you need to find your files in the left panel. If you click on the drop-down menu at the top and choose the last option, it will take you to the main hard drive. Locate your files by double clicking through the folder structure to get to your files. Because of the way this program works with UNIX, you will not see multiple hard drives as you do when using the Finder. If you instead double click on the "Volumes" folder, you will see the other discs connected to the machine. This includes the storage drive and any removable media (CDs, thumb drives, etc.) and is likely where you will need to start your search when working in the lab.
ITS maintains their own set of instructions for Fugu that go into more detail than this document. Consult them if you run into problems with Fugu. You web page should now be online. Launch your web browser of choice and type in the following, replacing the word "username" with your unique UH username: http://www2.hawaii.edu/~username/ Two things to note about this URL:
If the page does not load and produces an error explaining that you do not have permission to view the file, you may need to repeat the process of activating your home page. If a "file not found" error is produced instead, you have likely placed your files in the wrong place and will need to repeat the uploading process. If it loaded properly, great! The page can be viewed by anyone with a web connection, so feel free to send a link to friends and family directing them to your brand new web page!
|
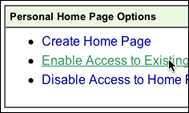 You
will be asked to login with your UH username and password. These are the
same as those used for checking your email and logging into myUH. Once
you have logged on to the site, you will see a menu of options presented
in two columns. In the middle of the column to the right, you will see an
option to "Enable Access to Existing Homepage Files". Click on
this option.
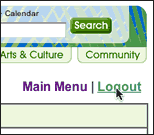 There
are a few different messages you may be presented with on the following page.
One of them should notify you of the operations success, but it may also
complain that you do not have any files currently present in your folder
on the server. This is OK, because you will be adding them in a moment. Be
sure to log out from this page before proceeding with this tutorial. If you
get an error, you will need to press continue before the web page will display
a logout option in the upper right hand corner.
 Leave
the other options alone and click on Connect. After a few
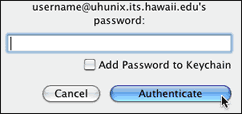
seconds, the window will change to ask you for your password. Enter it into
the entry field when you are ready. DO NOT check the box regarding the keychain
use. If you do, your password will be saved and the next user at that computer
will be able to connect to your account without having to know your password.
Click Authenticate.
 If you
see a blank file list in the right panel, the first thing you will need to
do is create a folder on the server for your web page. If you already see
a
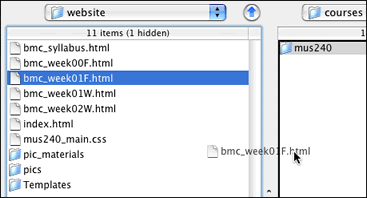 Once
you find your files on the local computer, uploading them to the server is
as simple as dragging them from one panel to the other. Make sure that you
are dragging them into the "public_html" folder that you created
earlier.
  Once you
are done, be sure to click the Disconnect button in Fugu's
toolbar and then quit the application.