| Getting Started with Dreamweaver
The file format that we will be primarily working with in Dreamweaver is an HTML file. HTML stands for Hyper-Text Markup Language and is a simple method of formatting your text so that it has a specific look and feel when viewed in a web browser. It does this through a series of tags. You'll see these in a minute.
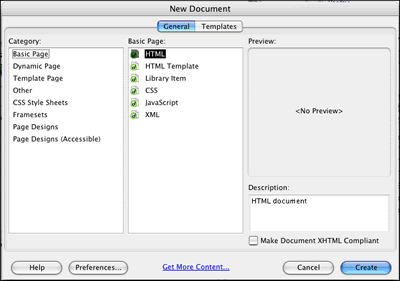
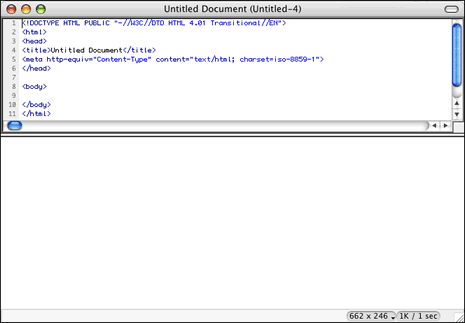
Feel free to look around in this window to see what file options are available to you. For this tutorial, you will simply select Basic Page in the first column and HTML from the second. Once you have done that press the Create button. You should now see a blank document window like this:
If your document does not have an upper and lower half like the screen shot above, go to the View menu and select the Code and Design option. In the upper portion, you can see what the raw HTML looks like. This is the code that your browser uses to render the web page. For example, the line that says
is responsible for telling the browser what the title of your document is. The two outer pieces of text in blue are HTML tags. The inner text in black is the title as it will be displayed at the top of your browser window. Since you probably don't want to call you page "Untitled Document", go ahead and highlight that text between the two title tags and change it to something more relevant. When you are done, go to the File menu and choose Save. A window should appear asking you where to save the file. Locate your folder, give the file a name and hit the Save button. You have just created you first web page (although it isn't much to look at). In order to add text to the web page, simply click into the white area and begin typing just like you would in MS Word. While typing, you will notice that the code at the top is updated. This can be helpful for learning how HTML works. Take note of the updates that you see as you type and you will quickly start to understand those tags better. Formatting the text will be easiest if you use the panel at the bottom of your screen. It looks like this:
If you don't see it at the bottom of your screen, it is possible that someone may have hidden it. Go to the View menu and select the Show Panels option. If that does not work, go to the Window menu and make sure that the Properties option is checked. One of these should make the palette visible. After you type the text you want to appear on you web page, simply highlight the portion you would like to reformat. The format menu allows you to designate section headings versus normal paragraphs. There are even 6 different levels of headings. The next menu allows you to change the font or typeface. This menu is much shorter than the one you would find in Word, but it contains options that are most likely to look correct in a browser. Next is size, which is not specified using point size as you may be accustomed to from Word. HTML uses it's own size system. The plain numbers define the size of an entire section, while the positive and negative selections allow you to make a small group of words bigger or smaller. Get the idea? Next you will see a small swatch of color. Clicking here will open a color palette for you to make your text more colorful. Be careful here. Colors can often make your text less readable. It helps to consult a second pair of eyes when trying out new color schemes. Continuing across the row, we have buttons for making text bold or italicized. The last set of buttons in this row allow you to change the alignment of text.
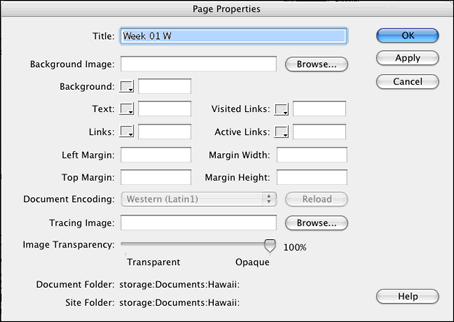
The first thing you should notice is the new title you typed into the code earlier is at the top of this window. This is a nice demonstration of how Dreamweaver allows you to work with either code or menus with one updating the other. Two options down you will see an option for background. Click on the color palette option and select the color you want the page to be. Hit OK and the window should disappear, then Dreamweaver will update your page. Feel free to go back to this window later to poke around and try out the other options. Most of your formatting options can be taken care of between these two palettes. Play around with these options to see what works and what doesn't. Be creative, but remember people have to be able to read your page. Avoid garish colors and fonts that are hard to read. Try to organize things in a logical manner. Other than that, have fun. The next tutorial will cover pictures, links and additional items that let your web page move beyond basic text. |
 This tutorial will walk you through the creation of a basic web page using Dreamweaver.
The key word here is basic. The page completed at the end of this tutorial
will not be much, but it is a start. Eventually, you can build several
interconnected pages, or a site, but you must crawl before
you walk. Start by launching the Dreamweaver application from the Dock (see
picture).
 Dreamweaver
will likely open up a blank HTML page by default. Go ahead and close this so
that we can get familiar with the process of opening a new file manually. Start
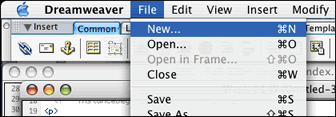
at the File menu and select the New option
(see picture). This should open a new window like the following:


 Now, that's
great for changing the text, but what about that white background? What if
you want to change that color? No problem. Start by going to the Modify menu
and selecting Page Properties. It will open up a new window
for you that looks like this: