|
Compressing Audio Files with NMP3
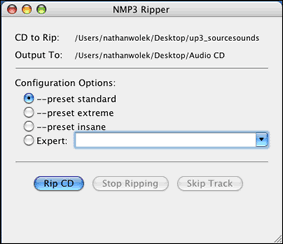
NMP3 Ripper is a free program that does one thing and does it well: convert audio to mp3s. It is distributed at stumod.com and available only for Mac OS X. If you would like to find an equivalent program for Windows, a quick google search should suffice. The program is designed to work with CDs, but will happily convert AIFF files if you let it. This tutorial will help you decipher the interface to use this application for this purpose. Begin by launching the application from the dock (icon pictured above). You will see the following window:
Note the references to CDs in the interface. From here it may not be immediately obvious what the next step is. That's where the tutorial can help.
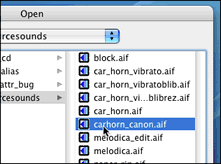
This will open a file browsing window. Use this to find and select your source AIFF file from the local drives. Once selected, click on the Open button.
Note that nothing will actually open when you do this. Do not be alarmed by this. You should still see the same window that you started with still open on the desktop. At the top, you will note the file location preceded by the words "CD to Rip" has changed. Although the full path name may be truncated, it should show you enough to realize that your AIFF file has been selected.
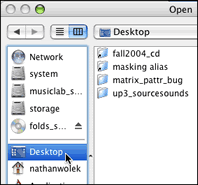
This will also open a file browsing window. This time you want to choose a location where the compressed mp3 file will be saved. Because we will not be storing it at this location permanently, perhaps the easiest thing to do is simply select the Desktop from the column on the left.
Click the Open button again. Once again, do not be alarmed that nothing actually opens. You will notice in the NMP3 window that the file location next to the text "Output to" has changed this time. Again, it may be truncated because of space, but should give you enough to see that a change was made.
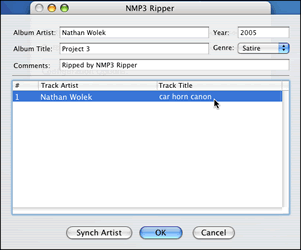
This will open another window over the main. The interface contains text fields for you to enter information about your audio file. These will be included in the file as ID3 tags, a type of metadata for mp3 files. I would advise you not to skip this page, because if anyone ever downloads the resulting mp3 from your web site, the ID3 tags can give them valuable information about what they are listening to and where it came from.
Once you have filled in the information, click OK. This will start the encoding process. The main window should return and display a progress bar keep you updated on how long the process is taking. Once it is done compressing your sound file, you will hear a "ding" from the speakers.
And that's it! Your audio file has now been compressed via mp3 encoding and placed onto you web site. Most current browsers will recognize the mp3 formatting and begin playing the file once someone clicks on the link. Others may have to download the file completely before they can hear it. Either way, the widespread use of the mp3 format will allowing you to share your audio creations with many others. |
 This tutorial
explains how to use the small utility application
 Start
by going to the File menu. Click on the first option, which
is labeled "Choose Tracks / Audio CD". Notice that you can also use the apple
- O keystroke to access this option.
 Next,
return to the File menu. This time,
select the second option, which is labeled "Choose Output Directory". Notice
that you can use the keystroke apple - D to access this option.
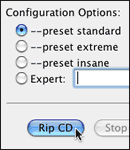 Now you are ready to compress your AIFF file. In the main window,
you notice that a list of "preset" options is given below your two file paths.
You can learn more about these
 If
you look at the desktop, you should see a new folder has been created with
your name and the "Album Name". You may have to click on the desktop before
it will be visible. Double-click on it to see the new mp3 version of your
audio file. The file is ready to be played in your favorite mp3 player and
shared with others.
 The
file name will likely contain a bogus track number, as well as extra spaces
in the name. If you are prepping the file for the web, it is a good
idea to edit these out. That way the file will give you less trouble once
it is
loaded onto the UNIX server. Click on the file icon once and the Finder
should allow you to start typing your changes. Be sure to preserve the "mp3"
extension
at the end of the name.
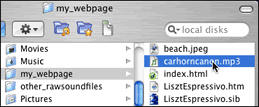
 After
editing the file name, you need to copy it to the local copy of your web
page folder (as pictured above). Once it is there, open
your web page in Dreamweaver again to add a link to the file.
After finishing
these additions to your web page, upload any modified html pages and new
mp3 file via Fugu.
After
editing the file name, you need to copy it to the local copy of your web
page folder (as pictured above). Once it is there, open
your web page in Dreamweaver again to add a link to the file.
After finishing
these additions to your web page, upload any modified html pages and new
mp3 file via Fugu.